|
Home > Website Administration > Website Settings > Design and Layout > Setting Up Your Menus
Setting Up Your Menus
You can edit the top and side menus of your website to suit your
requirements.
You only have to edit them in one place: they are saved
centrally and displayed on all your pages.
To Edit Your Menus
- Hover your mouse over either the top or the side menu.
- The Edit Menu button will appear to the right of
the menu. When you move your mouse cursor over the button, a red dotted
line appears around your chosen menu.

- Click the Edit Menu button
 to display the Menu Editor
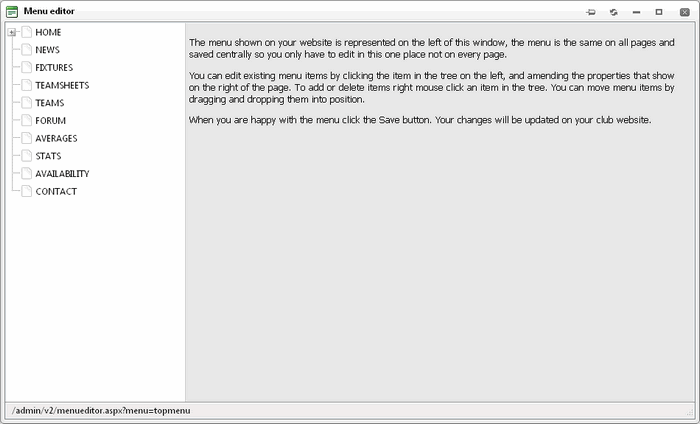
The menu items are displayed in a tree in the left
pane of the window.
To edit a menu item
- In the left pane click the menu item that you would
like to edit
Or:
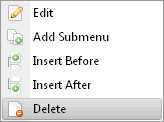
Right-click the menu item and select Edit in the
pop-up menu
- The properties of the menu item are displayed in the
right pane of the window.
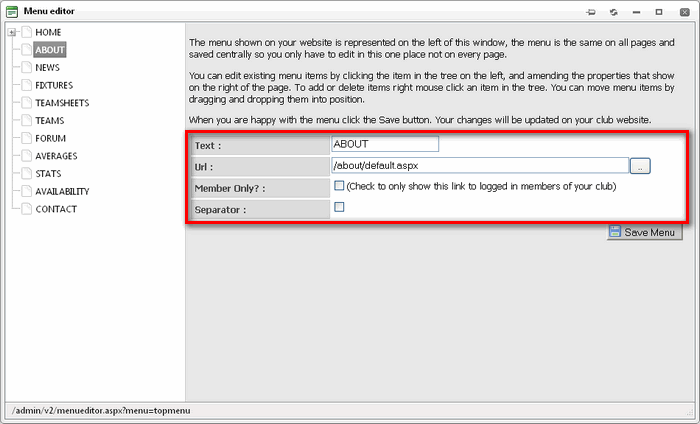
- To edit the text of the item, type in the Text
box
- To change the page that the menu item is linked to,
enter the new URL in the Url box.
Tip: To find the page in your site:
- Click on the "Select Page" button
 to the right of the Url box
 - The "Select Page" window is displayed. Click
the page that you want to link to.
- The window closes and the page URL is shown in
the box
- If you only want to allow logged-in members to view
the menu item, tick the Member Only box.
- When you have finished making your changes, click the
Save Menu button
 to
save your changes. to
save your changes.
- A message appears letting you know
that the menu has been updated.
Click the "refresh this page"
link to close the Menu Editor and see your changes.
To add a new menu item
- Right-click the menu item that your new menu item will
appear before or after
- Select Insert Before or Insert After in
the pop-up menu to add the new menu item before or after the item that
you selected
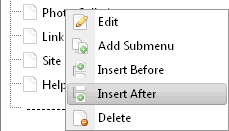
Tip: You can easily change the position of the item
in the menu later (see "To move a menu item" below)
- A new menu item is created.
- The properties of the menu item are displayed in the
right pane of the Menu Editor window.
Edit the boxes as required
(see step 2: To edit a menu item above).
- Click the Save Menu button
 to
save your changes. to
save your changes.
Tip: You might want to have a dividing line between
different groups of menu items. To add a separator after a menu item:
- Follow steps 1 to 3 in To add a new menu item
above
- Tick the Separator box in the right pane

- A dotted line separator is created. Click the Save Menu
button
 to
save the separator in your menu. to
save the separator in your menu.
To add a submenu
- Right-click the menu item under which the submenu is to
appear

- Select "Add Submenu" in the pop-up menu
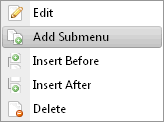
- A new submenu item is created.

See
step 2 above in To edit a menu item for instuctions on editing
the properties.
- Click the Save Menu button
 to
save your changes to
save your changes
To move a menu item
-
Drag the menu item in the left pane of the editor to its new
location
Tip: To turn a main menu item a submenu item, drag it
to the menu item that you would like it to appear under.
To delete a menu item
- Right-click the menu item that you want to remove
- Select "Delete" from the pop-up menu
- Click OK to confirm that you want to delete the menu
item
- Click the Save Menu button
 to
save your changes to
save your changes
See also
|