|
Home > Website Administration > Club database > Events > Adding an Event
Adding an Event
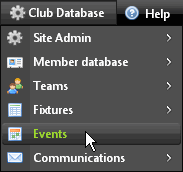
- Select Events from the Club Database menu
in the
Administration toolbar at the top of the page.
- The Events Calendar is displayed showing the
current month.
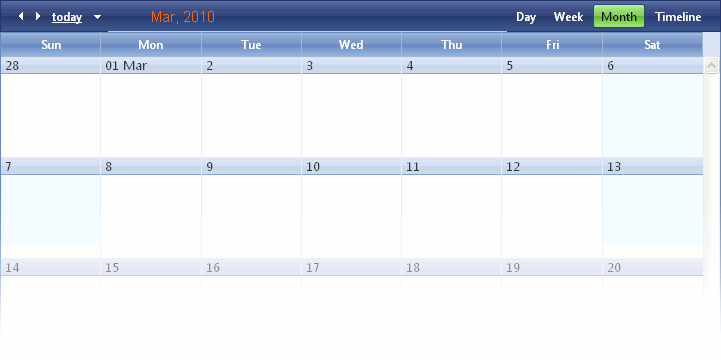
- Use the options in the bar at the top of the calendar to
navigate to the date for the event.
- Click the today link to go to the current
date
- Click the left
 and right
  arrows to move back a month or forward respectively
- Click the down
 arrow to display a calendar pop-up that you can use to navigate to a
particular month or day
arrow to display a calendar pop-up that you can use to navigate to a
particular month or day
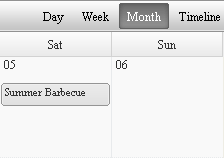
- Click Day, Week, Month or Timeline
to change the calendar view
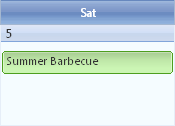
- Go to the date of your event in the calendar. The date
box is highlighted as you move your mouse cursor over it.
Either double-click it
-or-
Right-click and select New Event or New Recurring
Event from the menu.
- The Edit event window is displayed.
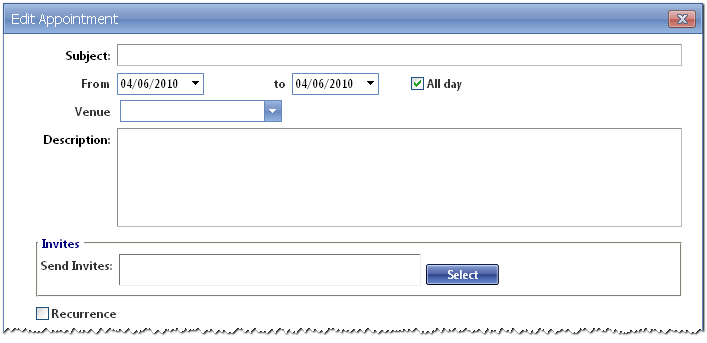
- Ensure that the Recurrence checkbox is not checked.
- Complete
the following fields in the form:
- Subject -
Enter the name of the event
- Edit the the From
and to dates, if required.
Tip: Click
inside the date box
to select the pop-up calendar
- All day
- Uncheck the checkbox if there is a start and end time. Time boxes
will appear next to the From and to dates.
Click the boxes to
select start and end times in the dropdown menu.
- Venue - Enter a venue or select from the dropdown list.
- Description
- enter a description of the event.
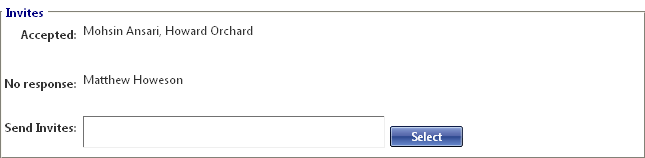
- To send invites,
click the "Select" button
 to display the Select Members window.
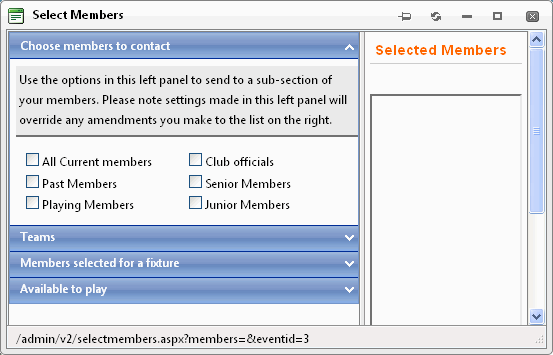
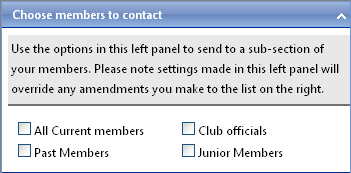
- In
the left hand panel choose the sub-section of members you want
to invite to the event:
Members
- Check the
boxes for the sub-sections of members that you want to invite.
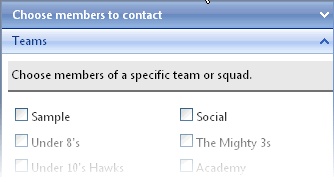
Teams
- Check
the boxes to choose the members of specific teams.
Members
selected for a fixture
- Select the season from the
list in the dropdown menu
- Select the team from the list in the
dropdown menu.
Tip: To select more than one team,
hold down the <Ctrl> key and left-click
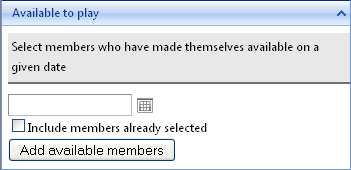
Available
to play
- To select members who have recorded that
they are available on a particular date:
i) Enter the date
ii)
To include members already selected, check the checkbox
iii)
Click the "Add available members" button
iv) The selection
criteria are displayed in the right hand panel
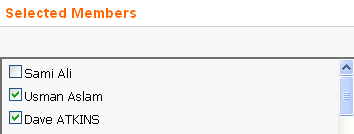
Note:
- The names of the members will be ticked in
the "Selected Members"
panel
- The selections you make will override selections in the
"Selected
Members" panel
- Make amendments to the
members you have selected in the right hand panel:
- Check
the box for each member you want to send the invite to
- Click
the "Select members" button
 when you have finished making your
selection.
when you have finished making your
selection.
- Click the "Save" button
 to save the event or click "Cancel"
  to cancel without saving.
- The event is displayed in the
calendar and will be shown on the Events page.
Admin
Calendar
Events
Page Calendar
- An email containing a link to accept
or decline the invitation will be emailed to all invitees.
Responses will be
stored in the system and displayed when you view the Edit event window
in the calendar.
|